Profiles — Where Firefox stores your bookmarks, passwords and other user data
All of the changes you make in Firefox, like your home page, what toolbars you use, extensions you have installed, saved passwords and your bookmarks, are all stored in a special folder, called a profile
. Your profile folder is stored in a separate place from the Firefox program so that, if something ever goes wrong with Firefox, your information will still be there. It also means you can uninstall Firefox without losing your settings and you don’t have to reinstall Firefox to clear your information or troubleshoot a problem.
Click the menu button  , click Help
and select Troubleshooting Information
.
From the Help
menu, choose Troubleshooting Information
.
The Troubleshooting Information tab will open.
- Under the Application Basics
section, click on . A window will open that contains your profile folder.
Your profile folder will open.
If you are unable to open or use Firefox, follow the instructions in Finding your profile without opening Firefox.
Finding your profile without opening Firefox
Firefox stores your profile folder in this location on your computer, by default:C:Users\AppDataRoamingMozillaFirefoxProfiles
Windows hides the AppData
folder by default but you can find your profile folder as follows:
- Press

+R
on the keyboard. A Run dialog will open. - Type in:%APPDATA%MozillaFirefoxProfiles
- Click . A window will open containing profile folders.
- Double-click the profile folder you wish to open. If you only have one profile, its folder would have «default» in the name.
- From the Start Screen, click the Desktop
tile. The Desktop view will open. - From the Desktop, hover in the lower right-hand corner to access the Charms.
- Select the Search
charm. The Search sidebar will open. - In the search box, type in:%APPDATA%MozillaFirefoxProfiles
without pressing Enter. A list of profile folders will appear. - Click on the profile folder you wish to open (it will open in a window). If you only have one profile, its folder would have «default» in the name.
- Click the Windows button. The Start menu will open.
- In the Search box at the bottom of the Start menu, type:%APPDATA%MozillaFirefoxProfiles
without pressing Enter. A list of profiles will appear at the top of the Start menu. - Click on the profile folder you wish to open (it will open in a window). If you only have a single profile, its folder would have «default» in the name.

- Alternatively, you can find your profile by pressing the
key and then start typing: %APPDATA%MozillaFirefoxProfiles
To set Windows to show the AppData
folder and other hidden files and folders, see Show hidden files — Windows Help.
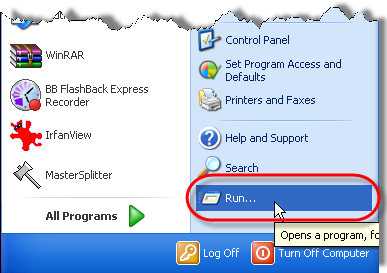
- Click the Windows button, and select Run…
.
- Type in:%APPDATA%MozillaFirefoxProfiles
then click . A window will open containing profile folders.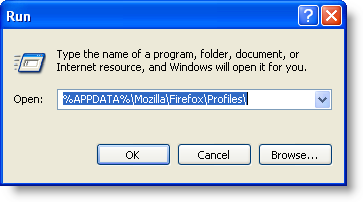
- Double-click the profile folder you wish to open. If you only have one profile, its folder would have «default» in the name.
- Click the Finder
icon in the dock. On the menu bar, click the Go
menu, hold down the option
or alt
key and select Library
. A window will open containing your Library folder. - Open the Application Support
folder, then open the Firefox
folder, and then the Profiles
folder. - Your profile folder is within this folder. If you only have one profile, its folder would have «default» in the name.
- (Ubuntu)
Click the Places
menu on the top right of the screen and select Home Folder
. A File Browser window will appear. - Click the View
menu and select Show Hidden Files
if it isn’t already checked. - Double click the folder marked .mozilla
. - Double click the folder marked firefox
. Your profile folder is within this folder. If you only have one profile, its folder would have «default» in the name.
This is not a complete list. Only important information is described.
- Bookmarks, Downloads and Browsing History:
The places.sqlite
file contains all your Firefox bookmarks and lists of all the files you’ve downloaded and websites you’ve visited. The bookmarkbackups
folder stores bookmark backup files, which can be used to restore your bookmarks. The favicons.sqlite
file contains all of the favicons for your Firefox bookmarks. For more information, see Bookmarks in Firefox and Restore bookmarks from backup or move them to another computer. - Passwords:
Your passwords are stored in the key4.db
and logins.json
files. For more information, see Password Manager — Remember, delete, change and import saved passwords in Firefox. - Site-specific preferences:
The permissions.sqlite
and content-prefs.sqlite
files store many of your Firefox permissions (for instance, which sites are allowed to display popups) or zoom levels that are set on a site-by-site basis (see Font size and zoom — increase the size of web pages). - Search engines:
The search.json.mozlz4
file stores user-installed search engines. For more information, see Add or remove a search engine in Firefox. - Personal dictionary:
The persdict.dat
file stores any custom words you have added to Firefox’s dictionary. For more information, see How do I use the Firefox spell checker?. - Autocomplete history:
The formhistory.sqlite
file remembers what you have searched for in the Firefox search bar and what information you’ve entered into forms on websites. For more information, see Control whether Firefox automatically fills in forms. - Cookies:
A cookie is a bit of information stored on your computer by a website you’ve visited. Usually this is something like your site preferences or login status. Cookies are all stored in the cookies.sqlite
file. - DOM storage:
DOM Storage is designed to provide a larger, more secure, and easier-to-use alternative to storing information in cookies. Information is stored in the webappsstore.sqlite
file for websites and in the chromeappsstore.sqlite
for about:* pages. - Extensions:
The extensions
folder, if it exists, stores files for any extensions you have installed. To learn more about Firefox extensions and other add-ons, see Find and install add-ons to add features to Firefox. - Security certificate settings:
The cert9.db
file stores all your security certificate settings and any SSL certificates you have imported into Firefox. - Security device settings:
The pkcs11.txt
file stores security module configuration. - Download actions:
The handlers.json
file stores your preferences that tell Firefox what to do when it comes across a particular type of file. For example, these are the settings that tell Firefox to open a PDF file with Acrobat Reader when you click on it. For more information, see Change what Firefox does when you click on or download a file. - Stored session:
The sessionstore.jsonlz4
file stores the currently open tabs and windows. For more information, see Restore previous session — Configure when Firefox shows your most recent tabs and windows. - Toolbar customization:
The xulstore.json
file stores toolbar and window size/position settings. For more information, see Customize Firefox controls, buttons and toolbars. - User preferences:
The prefs.js
file stores customized user preference settings, such as changes you make in Firefox Options
Preferences
dialogs. The optional user.js
file, if one exists, will override any modified preferences.
- Profile Manager — Create, remove, or switch Firefox profiles explains how to do things like, create a new profile, set a new default profile and delete an old profile.
- Recover user data missing after Firefox update explains how to use the Profile Manager to switch profiles, if multiple profiles exist.
- Back up and restore information in Firefox profiles explains how to back up and restore a profile. It also explains how to move your profile information to a different location on your hard drive or to another computer.
- Recovering important data from an old profile explains how to copy files to a new profile and includes a list of files that store information useful for recovery.
These fine people helped write this article:
, , , , , , , , , , , , , , , , , .
You can help too — find out how.
Перенос паролей Firefox с помощью дополнительного расширения
Тема паролей в веб-браузере Mozilla Firefox является очень актуальной для большинства интернет-пользователей. В статье «Пароли в Firefox» мы рассмотрели некоторые действия, касающиеся логинов и паролей. А именно, такие темы как:
- процесс запоминания паролей,
- просмотр сохраненных логинов,
- удаление входных данных на различные интернет-порталы,
- и частично затронули вопрос о местоположении паролей в firefox.
В этой рубрике мы поговорим о возможности выгрузки и загрузки логинов и паролей в поисковой системе Mozilla Firefox.
Импорт паролей из другого браузера в Мозилу
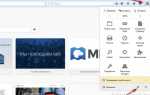
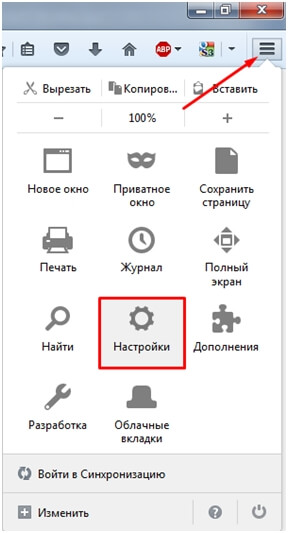
Если вам необходимо перенести сохраненные логины и пароли из одного любого другого браузера установленного на пользовательском персональном компьютере в Фаерфокс, то для этого не нужно скачивать и устанавливать никаких дополнительных расширений или плагинов. Данная функция есть в оболочке популярного интернет обозревателя. Для этого достаточно зайти в поисковую систему Мозила Фаерфокс, открыв меню (значок в правом верхнем углу окошка), выбрать в открывшемся списке пункт «Настройки».

В левой части инженерного меню выбираем параметр «Защита», в подпункте «Логины» нажимаем кнопочку «Сохранённые логины…»
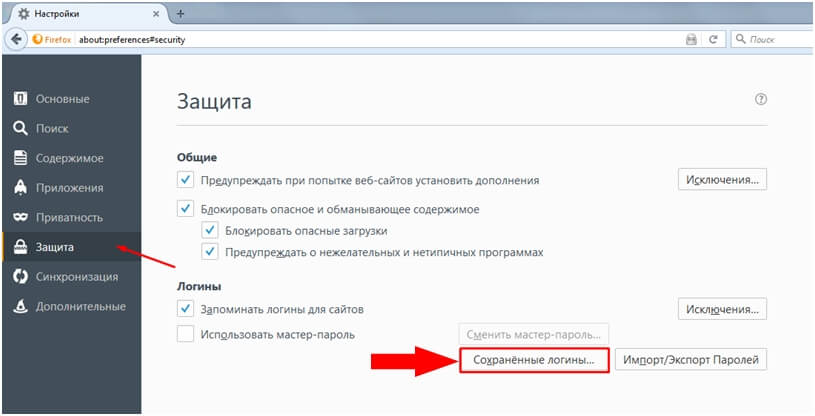
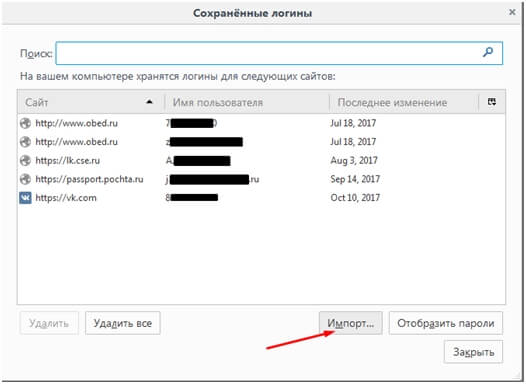
На этом этапе можно просмотреть все сайты с персональными данными (имя пользователя и пароль для входа).
Далее нажимаем кнопочку «Импорт…» для транспортировки пользовательских данных в новый браузер.
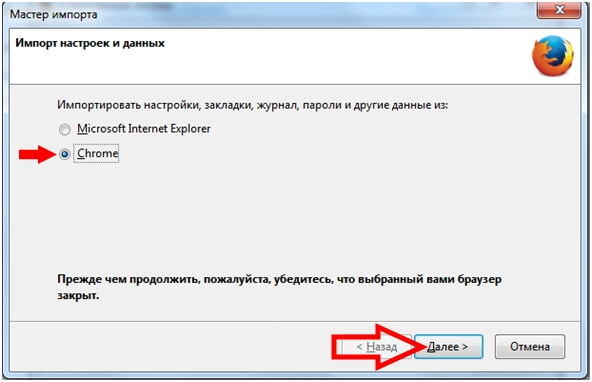
Далее необходимо выбрать браузер, из которого вы хотите перенести (импортировать) данные в Мозилу. Обратите внимание, что при проделывании данной операции, необходимо убедиться, что поисковик, из которого вы переносите данные, закрыт. Нажимаем кнопочку «Далее».
Затем вам предлагают выбрать объекты для импортирования. Отметьте галочками интересующие вас пункты и нажмите кнопочку «Далее».

Если перемещение объектов прошло удачно, появиться окошко Мастера импорта с успешным завершением переноса данных.
Жмём кнопку «Готово».
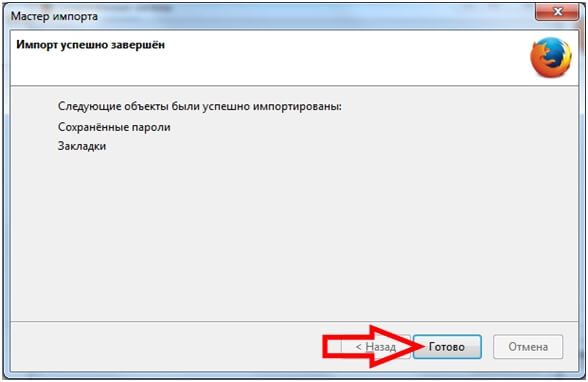
После этого все данные, которые вы отметили галочками, успешно скопированы в веб-браузер Фаерфокс.
Экспорт паролей из Firefox
Для чего это нужно? Для того, чтобы вы с легкостью могли восстановить персональные данные для доступа к различным сайтам при непредвиденных сбоях в работе интернет – обозревателя или для более безопасного хранения своих персональных данных (например, на переносном флеш-носителе информации). Пригодится данная возможность для ситуации, когда пользователю необходимо будет перенести свои данные об учётных записях на другой компьютер.
Чтобы осуществить экспорт паролей необходимо скачать приложение под названием «Password Exporter». С помощью этого дополнения вы сможете переносить пароли, сохраненные в интернет – браузере в XML формате.
Запускаем поисковую систему Mozilla Firefox, открываем меню, выбираем пункт «Дополнения».

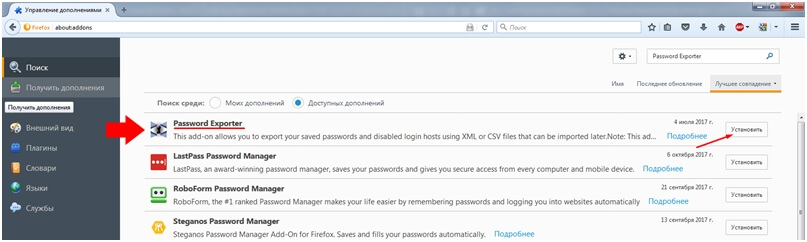
В поисковой строчке вводим название приложения «Password Exporter» и запускаем поиск.

Выбираем искомое дополнение и нажимаем кнопочку «Установить».
После того как вы установили расширение, можете приступать непосредственно к выгрузке своих логинов и паролей на ПК.
Открыв меню веб-браузера, выбираем пункт «Настройки».
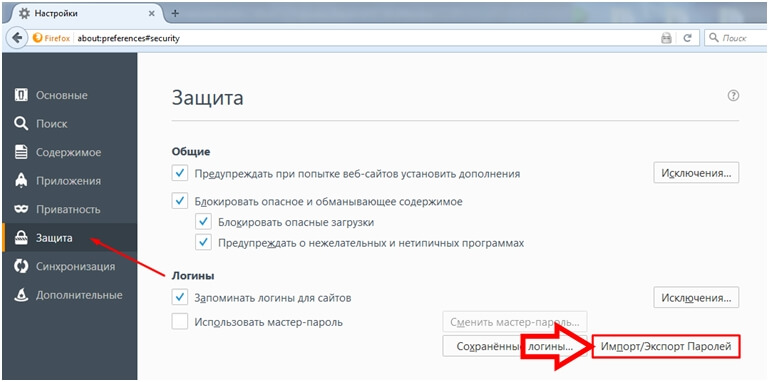
В левой части меню выбираем параметр «Защита», в подпункте «Логины» нажимаем кнопочку «Импорт/Экспорт Паролей».
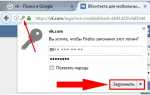
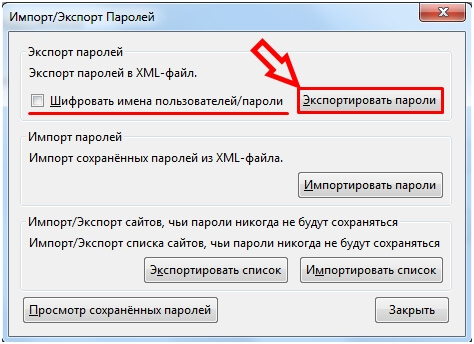
Далее нажимаем кнопочку «Экспортировать пароли», также дополнительно здесь можно выбрать параметр «Шифровать имена пользователей/пароли» для большей безопасности. Таким образом, при открытии файла с вашими входными данными отобразятся не персональные данные, а просто набор случайных разнообразных символов. Если такой файл просмотрит посторонний человек, он не сможет разобраться в прочтённом документе и воспользоваться вашими персональными данными, логинами и паролями. Такой файл можно отправлять по электронной почте, но всё-таки для большей безопасности лучше такой файл заархивировать и поставить дополнительный пароль.
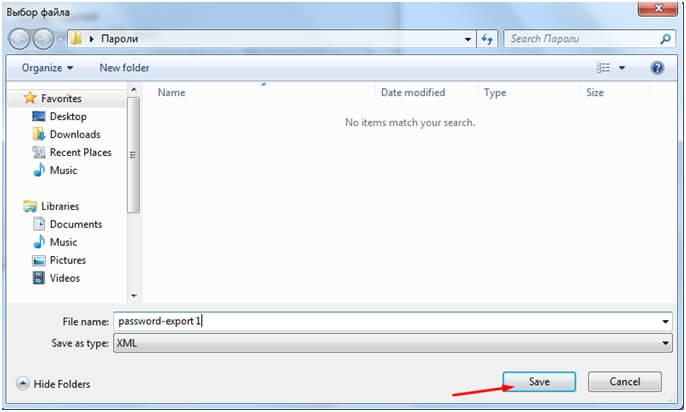
После того как вы нажали на кнопку «Экспортировать пароли», откроется окошко, в котором надо выбрать куда сохранить файл, нажимаем кнопочку «Save».
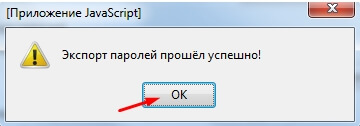
При удачно проведенной процедуре, появиться сообщение «Экспорт паролей прошёл успешно!». Жмем копку «ОК».
Импорт паролей Firefox
Для импорта паролей необходимо запустить браузер Mozilla => открыть Меню => зайти в Настройки => выбрать в левой части окна пункт Защита => в подпункте «Логины» нажать кнопочку «Импорт/Экспорт Паролей» => для начала загрузки данных кнопкой «Импортировать пароли» необходимо начать процесс.

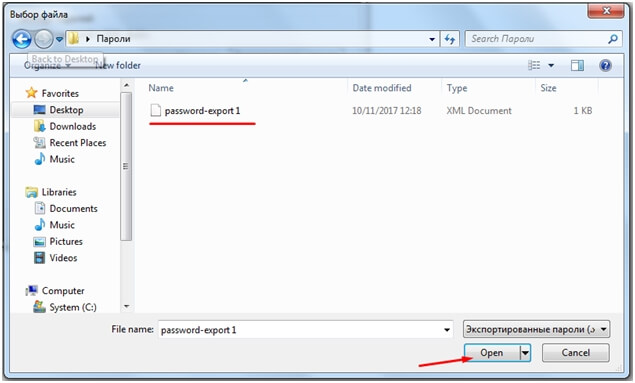
Затем в открытом окошке, выбрав файл в формате «XML» для загрузки, кликнем кнопку «Open».
В окошке «Импорт/Экспорт Паролей» начнется процесс копирования входных данных, после его завершения можно просмотреть детали данного действия. В этом окне отображаются подробные детали по импортированию персональных данных. Таким образом, благодаря дополнительному расширению «Password Exporter» вы можете с легкостью выгружать и загружать свои персональные данные (имена пользователей, пароли, сетевые ресурсы), перемещать их с компьютера на компьютер, а также восстанавливать утраченные данные в случаи непредвиденных обстоятельств.
Примечание:
Имена пользователей и пароли должны быть использованы только с английской раскладкой. Кириллицу документы формата «XML» не воспринимают и заменяют русские буквы абракадаброй. Файл с данными с такими непонятными символами импортировать в дальнейшем в браузер Mozilla Firefox не удастся!